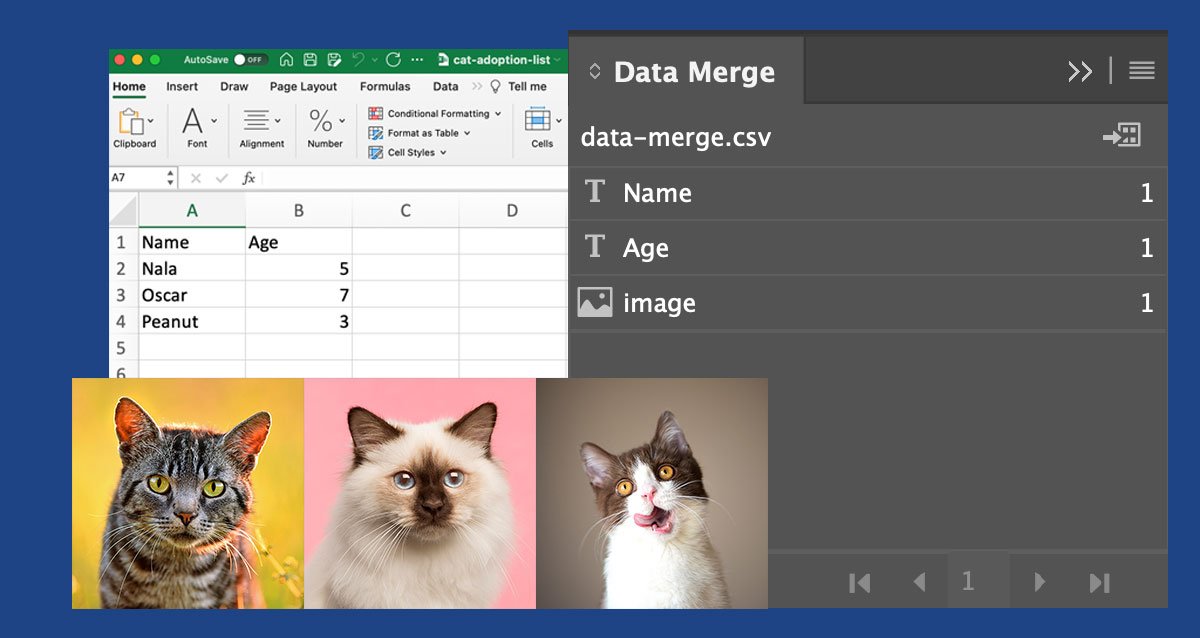
InDesign’s Data Merge panel is a powerful tool that can save you time and effort by allowing you to quickly create multiple variations of your document. By merging external data source files, such as CSV or TXT files, with your InDesign document, you can generate hundreds of copies of personalized letters, envelopes, mailing labels, signs, and other marketing materials with ease. This functionality, commonly known as mail merge, is an efficient way to automate the production of files and ensure accuracy in your final product.
In this post, we will go over the the steps on how to use InDesign’s Data Merge panel using the example of creating cat adoption graphics that are intended to be printed or shared on social media.
Note: The steps below use a MacOS and Microsoft Excel. Other operating systems and spreadsheet tools will likely work following the same steps.
Video Tutorial
Time needed: 20 minutes
How to Use InDesign Data Merge for Text and Image Automation
- Locate the data to be used for data merge.
To start, you will need the following three files:
– The final InDesign file (do not outline or flatten any layers).
– A list of the text to be changed, preferably in spreadsheet.
– A folder of the images, preferably in the same format. Make sure the Images folder is within the same folder level as your InDesign file.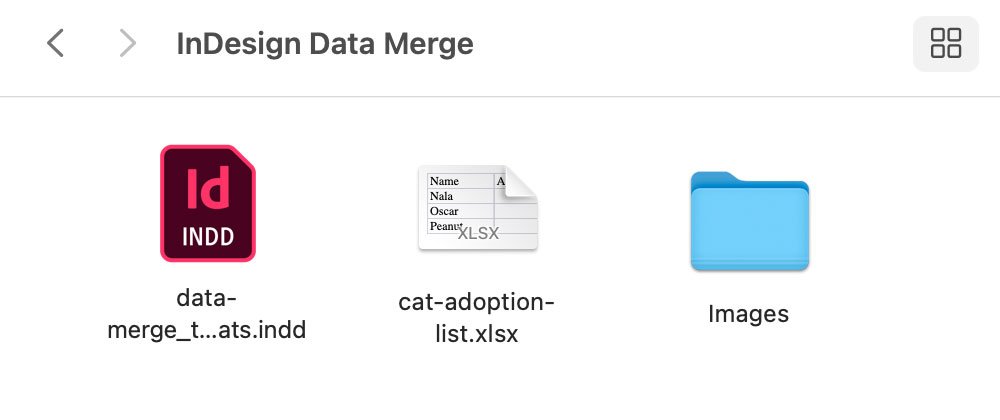
- Create a new spreadsheet
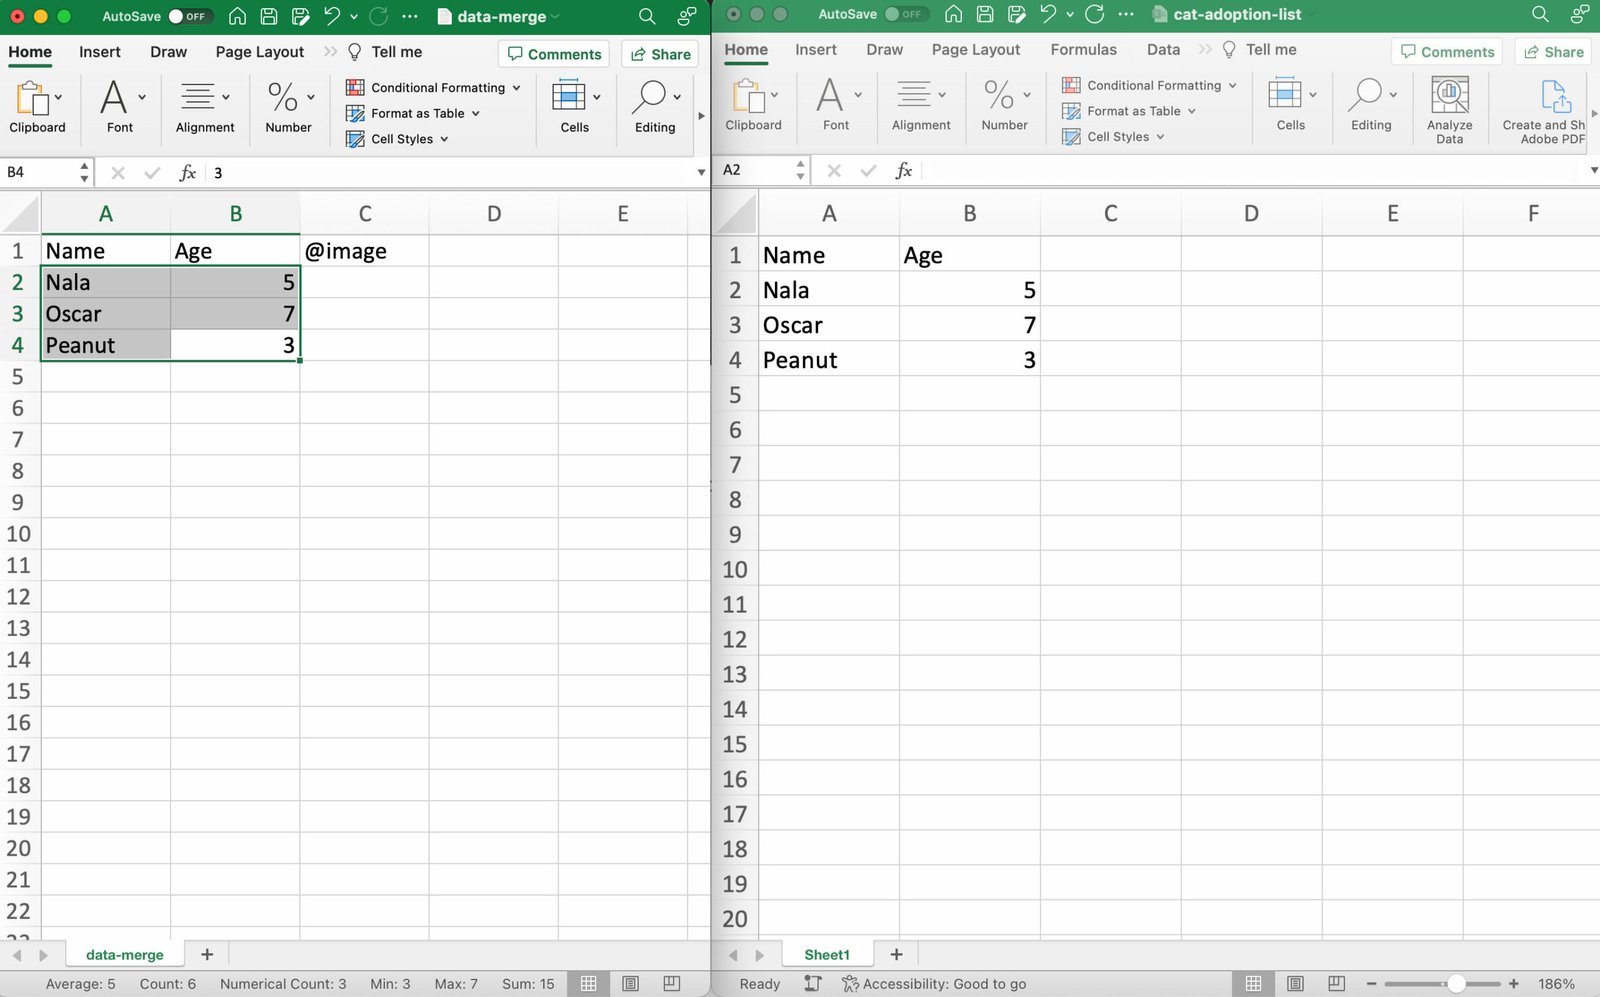
Create a new Google Sheet or Excel Workbook in the same folder name the file data-merge and save it as a .CSV file.
Each column will represent a layer within InDesign that you want updated with text or an image.
In cell A1 add the label Name and in cell B1 add the label Age, and in C1 add label @image (you will need to type in an apostrophe ‘@image in the field, so the cell is treated as text. The apostrophe will disappear when you click the checkmark.)

- Copy text into spreadsheet
Open the list of the text to be changed spreadsheet and copy and paste the data in the correct columns. Delete any blank cell fields.
- Copy image file names to spreadsheet
The folder of the images, should be ordered to match the text fields you pasted into the spreadsheet. If your image files are not labeled sequentially, you can go back to sort your text fields by A-Z (i.e., Name) and do the same for the images in the folder.
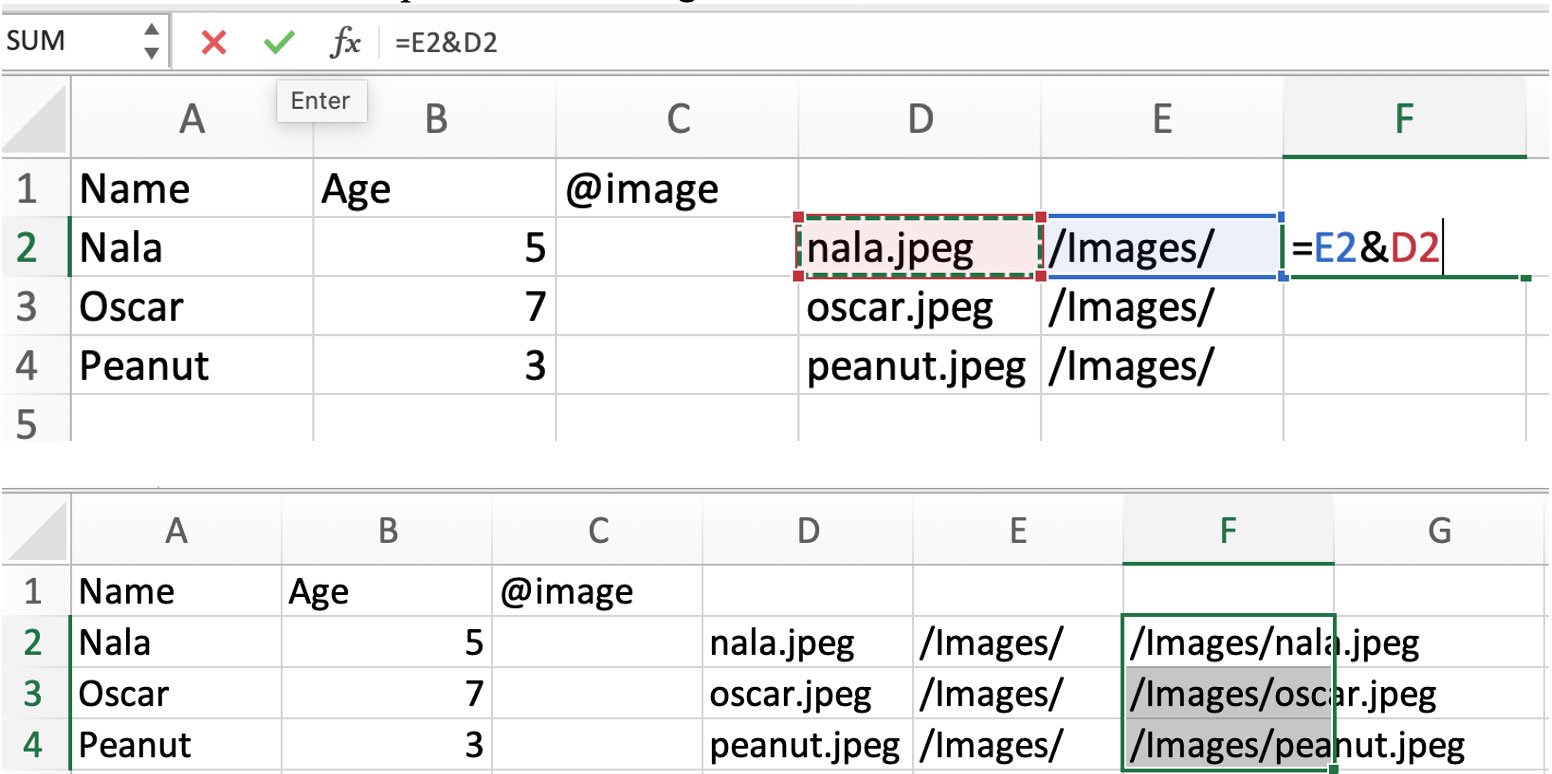
Then Select All and copy the files, then go to your spreadsheet and select cell D2 and paste. The list of image file names should now be pasted in the column.
- Type in /Images/ file path
In cell E2 type the name of the folder of the images to define the file path and copy the same name down the columns. Use the / before and after the name.

- Complete image file path
In cell F2 type the formula ‘=E2&D2’ and click the check mark (i.e., hit enter) to accept the formula. Then drag the corner of that cell down the column so it repeats the formula. You should now have the file path for each image.
- Paste
Copy the file path from Column F and paste special ‘Values Only’ to cell C2. Then delete column D, E, and F.
Save the spreadsheet as its ready to be used in InDesign.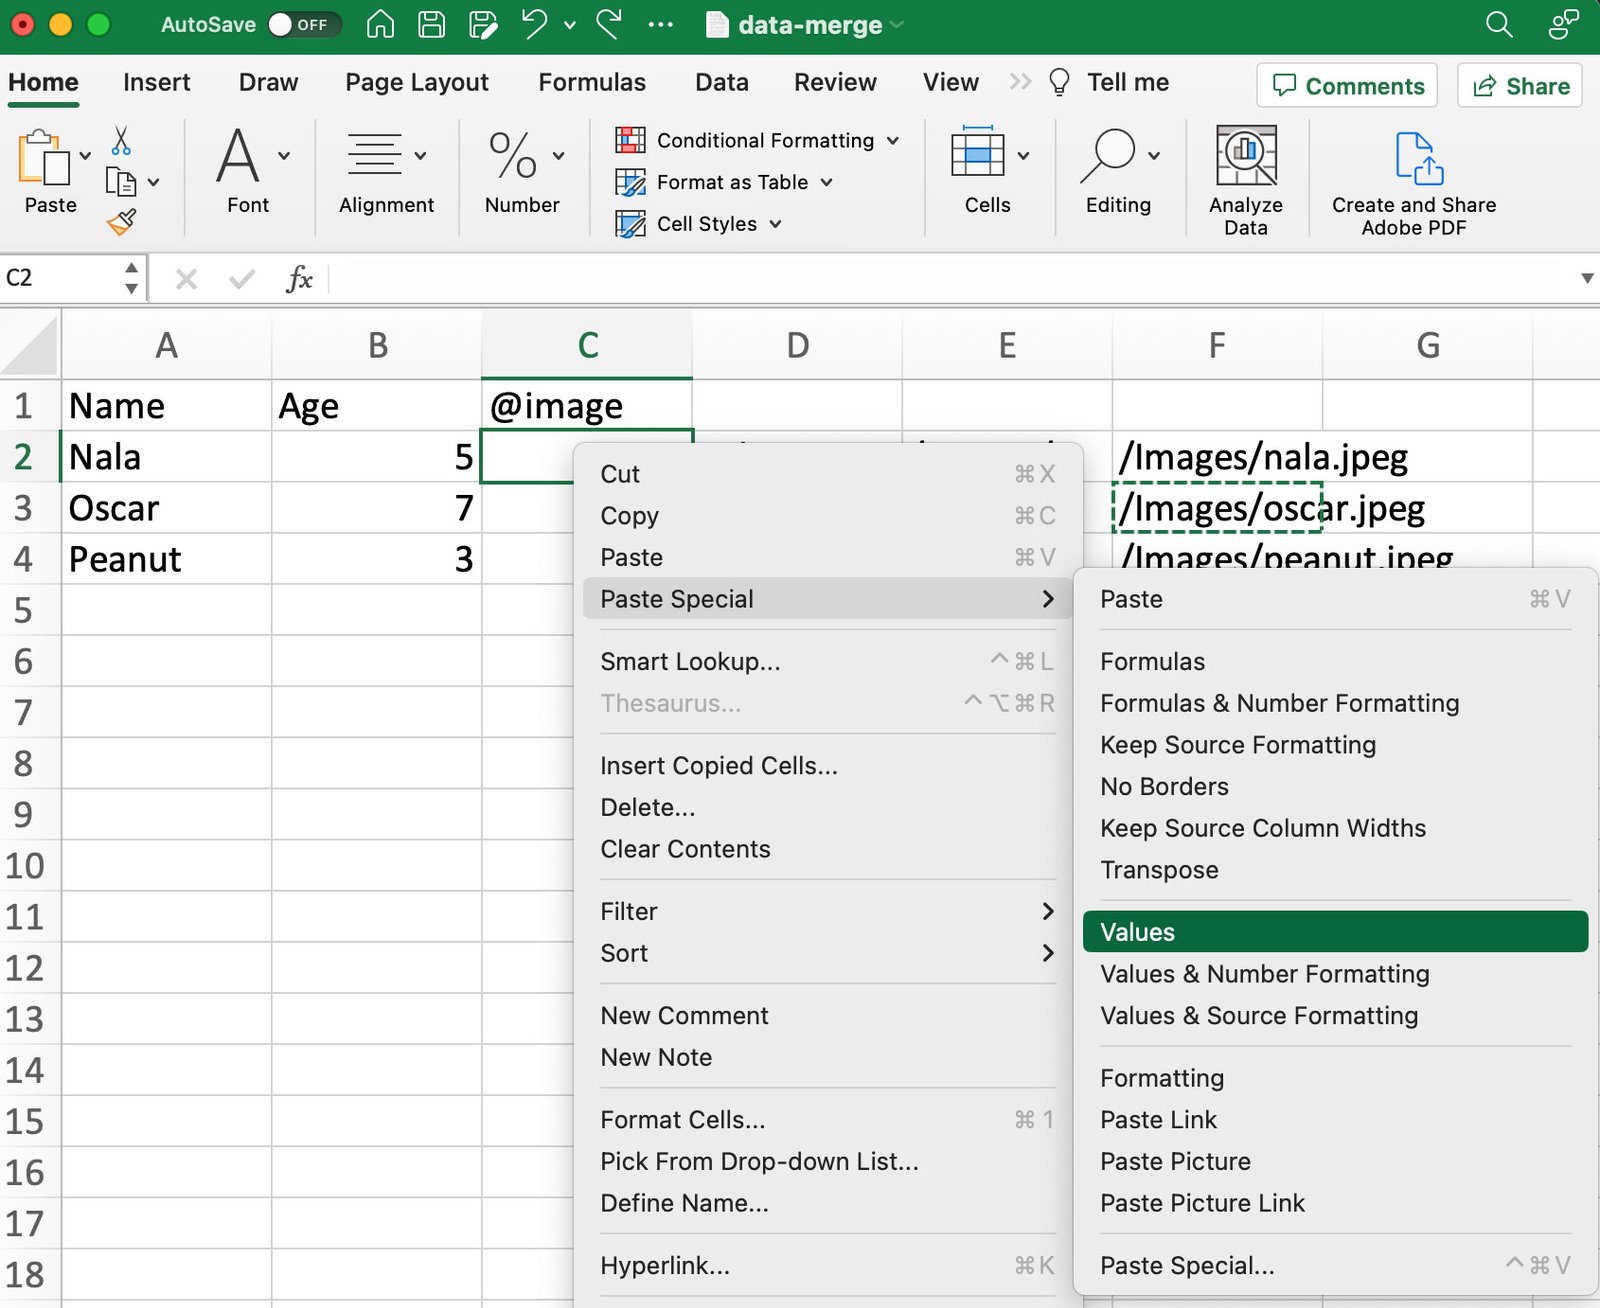
- Go to InDesign and open Data Merge panel
In your InDesign file, make sure there are no broken links or missing fonts. Open up the Window called Data Merge. You can find it under Window -> Utilities.

- Import .CSV spreadsheet
On the top-right-hand corner of the window, click on the menu icon and click Select Data Source and choose the data-merge.csv file.
After opening the file you will see the Name, Age and image labels in the window.
- Drag data to layers
Starting with the Name, go to the text box where the name data will be changed and highlight the name. Then left-click on Name in the Data Merge window and it should replace it with <<Name>> in the text box.
For Age we will only highlight the number ‘5’ in the text. For the image you can follow the same steps.
Click on the Preview checkbox to view the changes, and you can click on the right left arrow to view each version of the design. This is good to check if there are any unwanted line breaks or missing images.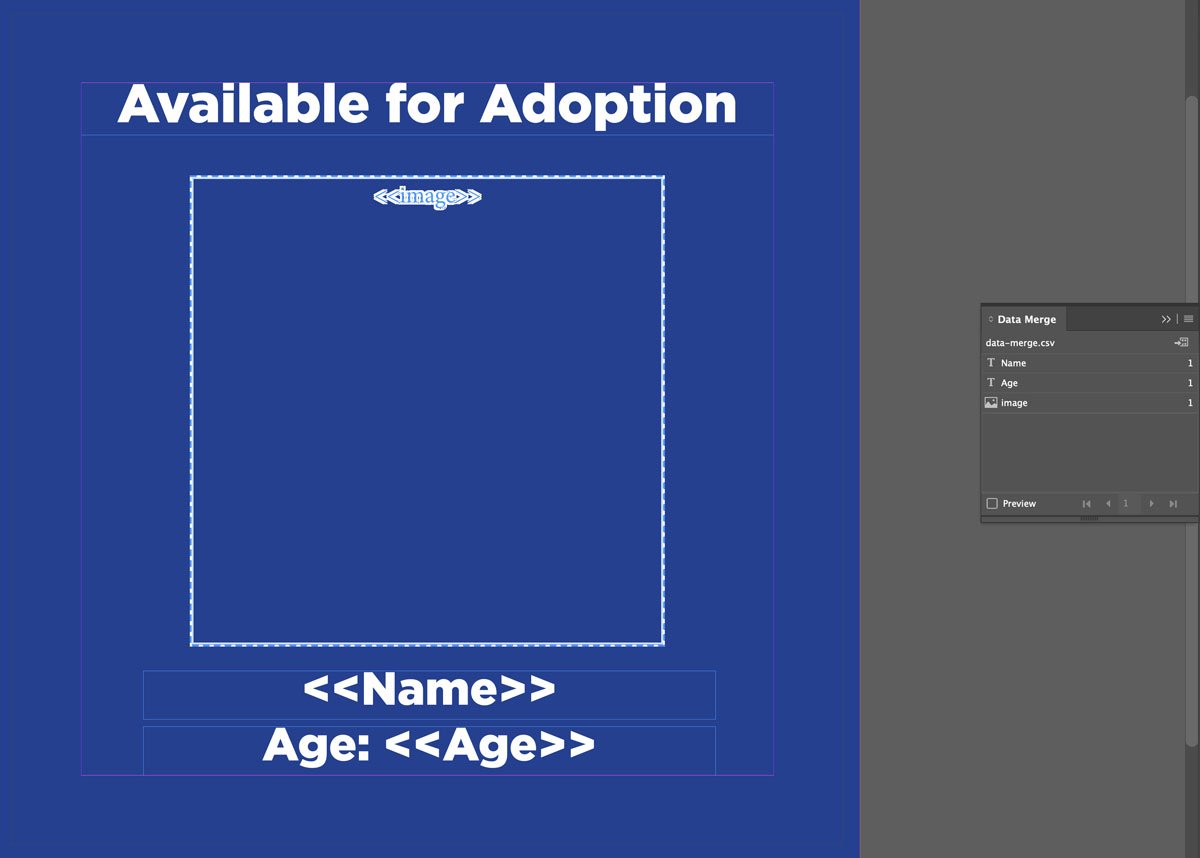
- Export to PDF
Uncheck the Preview, and then click on the menu icon of the Data Merge window and select Export To PDF.
You will want to merge All Records and to save all versions. The rest of the settings under Multiple Record Layout and Options can remain at default.
- Configure PDF Settings
You will now see the Adobe PDF save window. If you want to create separate files per record, under the Pages section, check Create Separate PDF Files and select the Suffix to be Incremental Numbers. The field should display ^#
Configure your PDF settings with desired settings (i.e., bleed, crop, compression, destination color, etc.), you can save it as a Preset for future use and then click Export. A window will come up to ask where you do want to save the PDF, name the folder as a single word so the file names don’t look too crazy.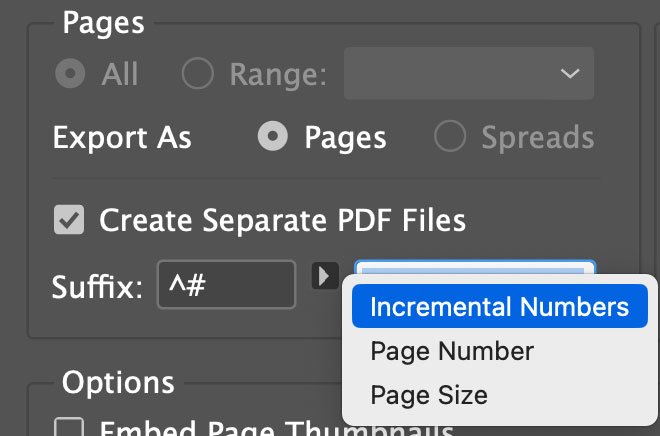
- Verify Exported Files
View the folder where the PDF images were saved to check if everything was rendered correctly. You will see that the PDF name is cat01.pdf. You can adjust how the name outputs in the Adobe PDF window in the Suffix field, but this is the simplest.
I recommend selecting all the files in the folder to view the count, in this case 3 and then select a column in the spreadsheet to compare the count to make sure the numbers match as another quick check.
Done!
Summary of Benefits on Using InDesign’s Data Merge Tool
There are numerous benefits of using InDesign Data Merge tool, such as:
- Time-saving: Data merge can significantly reduce the time it takes to create personalized marketing materials like catalogs, brochures, or invitations by automatically generating multiple variations of the same document.
- Customization: InDesign data merge allows you to personalize your documents by inserting unique text and images for each file.
- Accuracy: By merging data from external sources, you can avoid manual errors that can occur when creating files manually, such as typos or incorrect information.
- Scalability: InDesign data merge is scalable, making it ideal for producing large number of files.
- Flexibility: You can use different data sources like .CSV or .TXT files to merge your data, giving you more flexibility in how you create your documents.
In conclusion, InDesign’s Data Merge is a valuable tool for any designer or marketer looking to create personalized, accurate, and scalable marketing materials efficiently.
What questions or stuck on a certain step? Comment below or reach out to us for help.
